How to Deploy and Mint KRC20 Token
With Kastle Browser Extension, you can easily deploy (create) your own KRC-20 token and later mint additional tokens as needed. This guide walks you through both processes from start to finish.

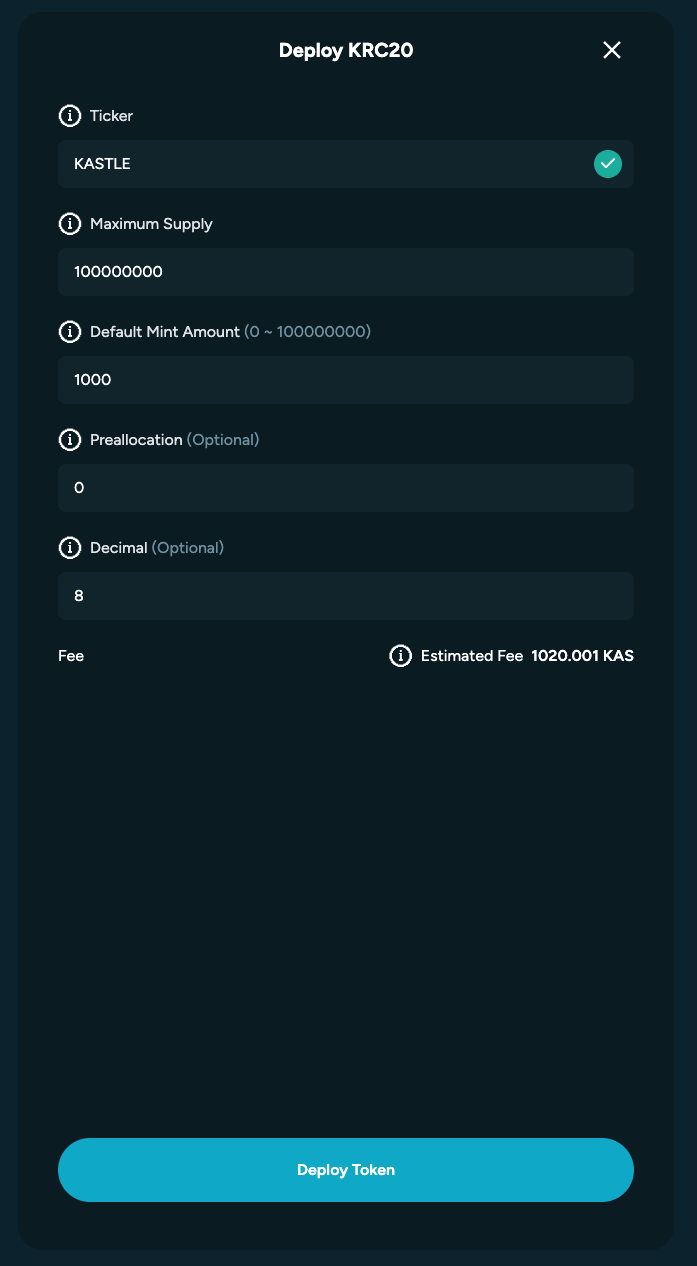
- After clicking “Deploy”, the KRC-20 deployment interface will open. Here you’ll fill in the required fields to define your token’s key parameters.
Deploy
Field
Description
Ticker
A short, unique abbreviation for your token — e.g. BTC for Bitcoin or KAS for Kaspa.
Maximum Supply
The total number of tokens that will ever exist. This value cannot be changed after deployment.
Default Mint Amount
The number of tokens created each time you mint.
Preallocation
The amount of tokens automatically created and assigned to your wallet (the deployer) at launch.
Decimal
Defines how divisible your token is (e.g. 8 decimals means one token can be split into 0.00000001).
Fields Overview
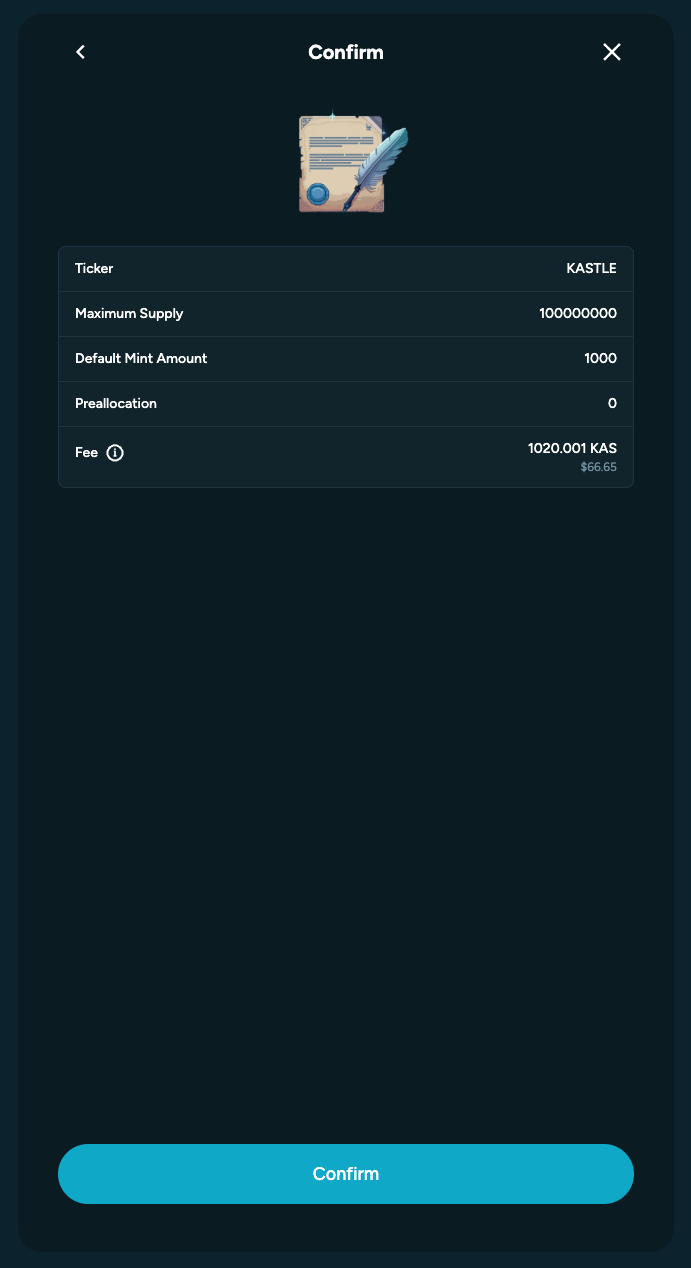
- Once all fields are filled, review your details carefully, then confirm the transaction to deploy your token on the Kaspa network.
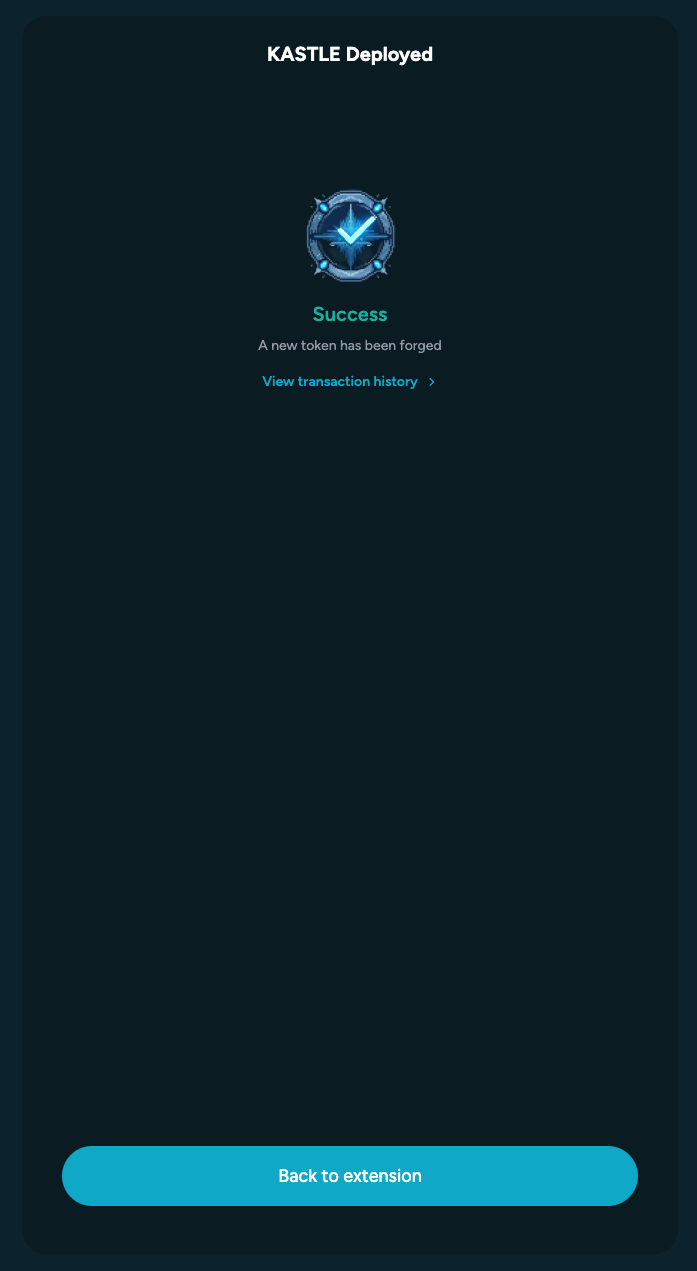
- If deployment succeeds, you’ll see a confirmation screen and your new token will appear in the Assets section of your wallet.
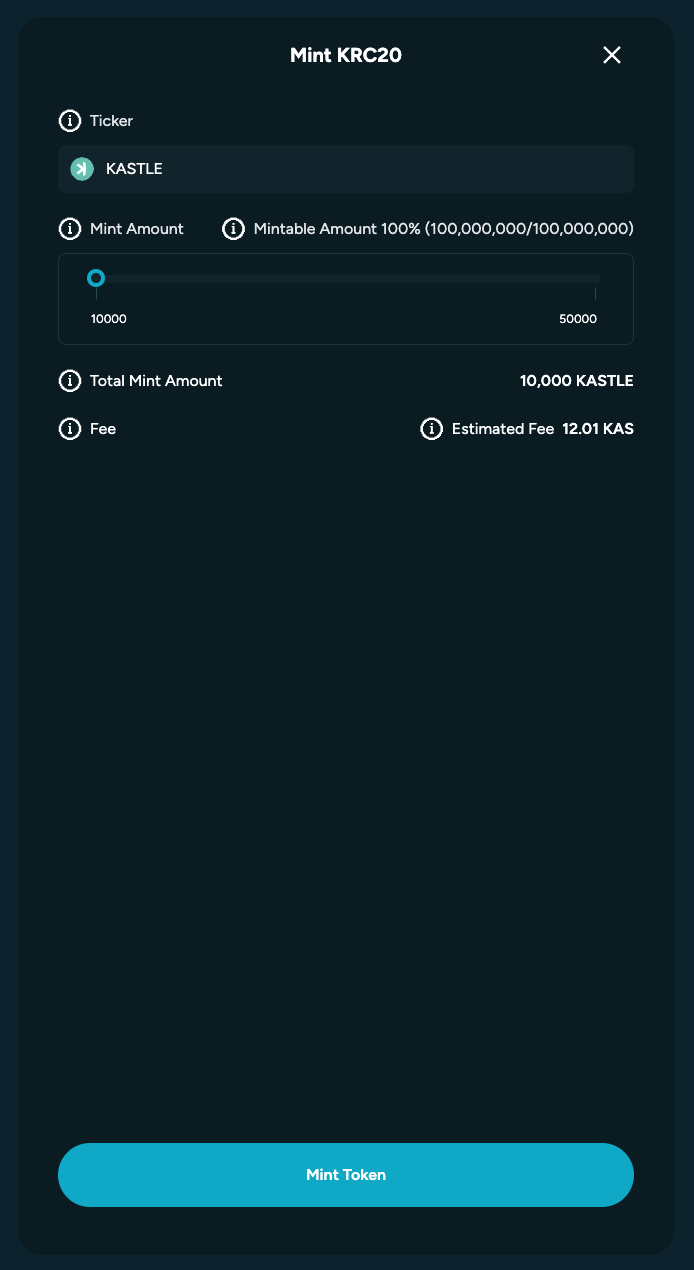
Mint
You can mint any KRC-20 token that has been deployed on the Kaspa network, as long as it hasn’t yet reached its maximum supply. You don’t need to be the original deployer to mint — only the token’s configuration determines if additional minting is allowed.
To mint new tokens:
- Open the Mint feature in your wallet.
- Enter the token ticker you want to mint.
- Select the number of times you wish to mint, based on the token’s predefined default mint amount and remaining supply.
- Click “Mint Token.”
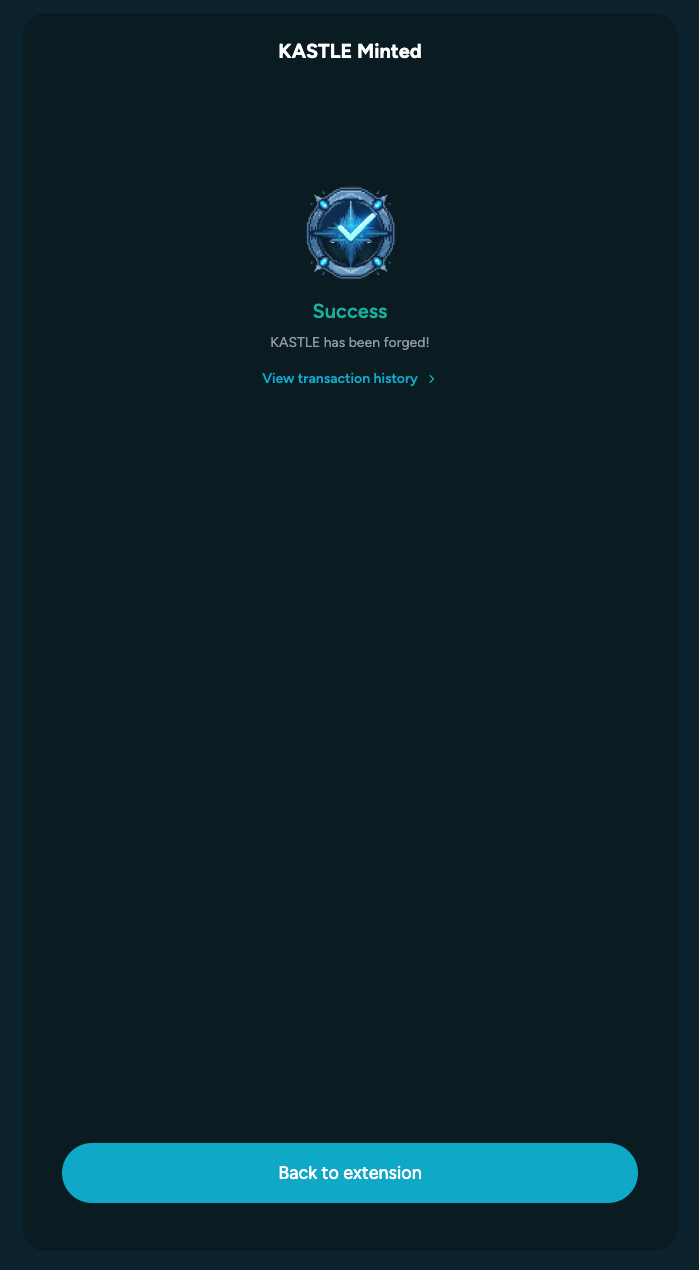
Once the transaction is confirmed, wait for the process to complete. If the mint succeeds, a confirmation screen will appear, and the newly minted tokens will show up in your Assets section.
How to Deploy and Mint KRC20 Token
With Kastle Browser Extension, you can easily deploy (create) your own KRC-20 token and later mint additional tokens as needed. This guide walks you through both processes from start to finish.
- After clicking “Deploy”, the KRC-20 deployment interface will open. Here you’ll fill in the required fields to define your token’s key parameters.
Deploy
Field
Description
Ticker
A short, unique abbreviation for your token — e.g. BTC for Bitcoin or KAS for Kaspa.
Maximum Supply
The total number of tokens that will ever exist. This value cannot be changed after deployment.
Default Mint Amount
The number of tokens created each time you mint.
Preallocation
The amount of tokens automatically created and assigned to your wallet (the deployer) at launch.
Decimal
Defines how divisible your token is (e.g. 8 decimals means one token can be split into 0.00000001).
Fields Overview
- Once all fields are filled, review your details carefully, then confirm the transaction to deploy your token on the Kaspa network.
- If deployment succeeds, you’ll see a confirmation screen and your new token will appear in the Assets section of your wallet.
Mint
You can mint any KRC-20 token that has been deployed on the Kaspa network, as long as it hasn’t yet reached its maximum supply. You don’t need to be the original deployer to mint — only the token’s configuration determines if additional minting is allowed.
To mint new tokens:
- Open the Mint feature in your wallet.
- Enter the token ticker you want to mint.
- Select the number of times you wish to mint, based on the token’s predefined default mint amount and remaining supply.
- Click “Mint Token.”
Once the transaction is confirmed, wait for the process to complete. If the mint succeeds, a confirmation screen will appear, and the newly minted tokens will show up in your Assets section.
How to Deploy and Mint KRC20 Token
With Kastle Browser Extension, you can easily deploy (create) your own KRC-20 token and later mint additional tokens as needed. This guide walks you through both processes from start to finish.
Deploy
- After clicking “Deploy”, the KRC-20 deployment interface will open. Here you’ll fill in the required fields to define your token’s key parameters.
Fields Overview
Field
Description
Ticker
A short, unique abbreviation for your token — e.g. BTC for Bitcoin or KAS for Kaspa.
Maximum Supply
The total number of tokens that will ever exist. This value cannot be changed after deployment.
Default Mint Amount
The number of tokens created each time you mint.
Preallocation
The amount of tokens automatically created and assigned to your wallet (the deployer) at launch.
Decimal
Defines how divisible your token is (e.g. 8 decimals means one token can be split into 0.00000001).
- Once all fields are filled, review your details carefully, then confirm the transaction to deploy your token on the Kaspa network.
- If deployment succeeds, you’ll see a confirmation screen and your new token will appear in the Assets section of your wallet.
Mint
You can mint any KRC-20 token that has been deployed on the Kaspa network, as long as it hasn’t yet reached its maximum supply. You don’t need to be the original deployer to mint — only the token’s configuration determines if additional minting is allowed.
To mint new tokens:
- Open the Mint feature in your wallet.
- Enter the token ticker you want to mint.
- Select the number of times you wish to mint, based on the token’s predefined default mint amount and remaining supply.
- Click “Mint Token.”
Once the transaction is confirmed, wait for the process to complete. If the mint succeeds, a confirmation screen will appear, and the newly minted tokens will show up in your Assets section.